Route 03 · Waterfalls

Shaping Falling Water

Shutter speed decides what falling water feels like: violent, textured or calm. Choose the feeling first, then work out the exposure, the filter and a position that keeps you and your equipment out of harm's way.

Three-panel flat diagram comparing a waterfall frozen at 1/1000 second, textured at 1/30 second and smoothed at one second1/1000 s1/30 s1 s
The same fall at three shutter speeds.
03

Decide what the water should feel like

There is no correct waterfall exposure. A heavy spring flood frozen at 1/1000 s communicates force; the same fall at one second becomes a quiet ribbon. Many of the most honest images sit in between, around 1/15 to 1/30 s, where the water moves but keeps its structure.

Make a short bracket of speeds at each position and compare them on the spot. It trains your eye faster than any rule.

↓

Exposure comparison

1/1000 sfrozen sprayIndividual droplets, raw power. Handheld in daylight; ideal for big flows after snowmelt.
1/125 scrisp motionSlight blur at the edges of the flow. Good from ferries and moving platforms.
1/15 skept textureStreaks with visible structure. Tripod recommended; often the most faithful rendering.
1/2 ssoft ribbonsFlowing lines with some definition. Tripod required; may need a light ND filter.
4 s+smoothed mistWater becomes a veil. Requires a strong ND filter in daylight; watch for wind-shaken vegetation.

Neutral density filter maths

Each stop doubles the exposure time. Starting from a metered daylight exposure of 1/60 s:

FilterStopsResulting exposureTypical use
ND83about 1/8 sOvercast days, textured water
ND646about 1 sVersatile first filter for falls
ND100010about 15 sMist effects, smoothing the fjord surface

Flow, season and regulation

Fjord waterfalls are driven by snowmelt. Flow usually peaks from late May into June, then drops through late summer, recovering with autumn rain. Many rivers in western Norway are also regulated for hydropower, which can reduce or redirect flow. At Vøringsfossen, a minimum flow is maintained for visitors during the summer season, while some smaller falls may shrink to a trickle.

Spray and lens care

Large falls generate spray that drifts far beyond the pool. Work from the upwind side, fit a lens hood, keep a dry microfibre cloth in an inner pocket and cover the lens between frames. Composing first and removing the cover only for the exposure saves a lot of wiping. A rain cover for the camera body is worth its small weight.
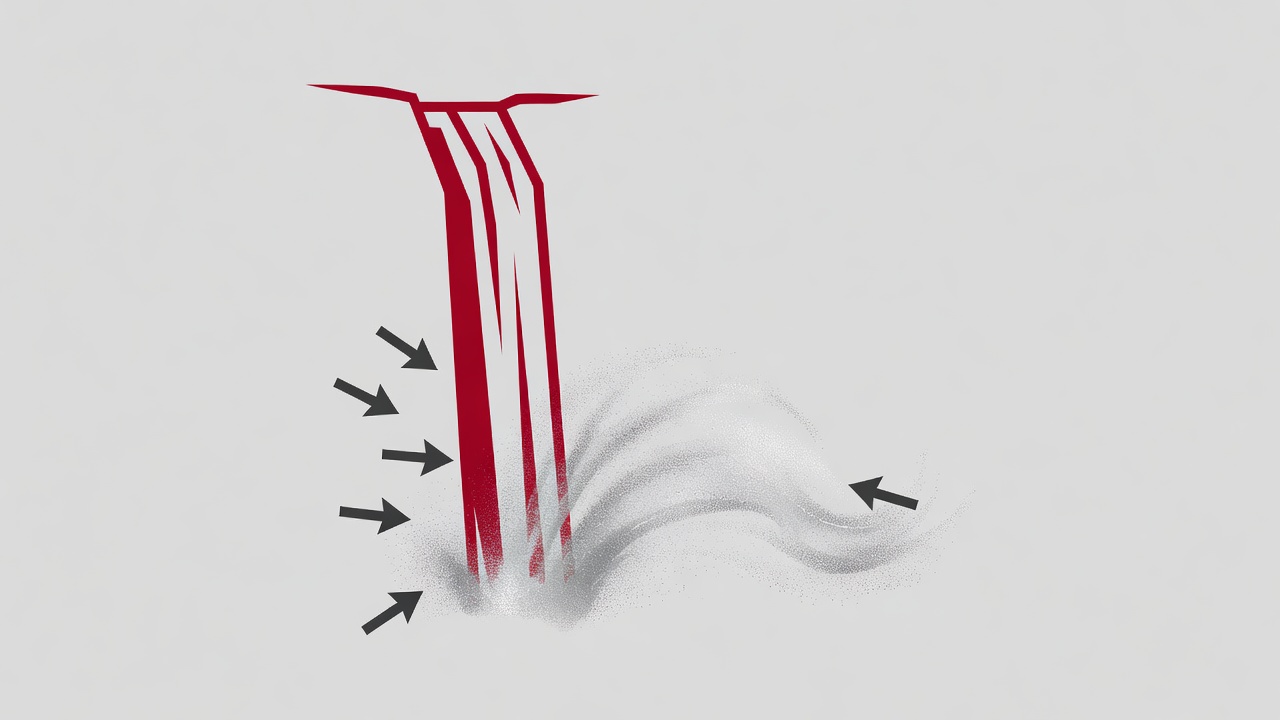
Flat vector diagram in crimson, silver and charcoal showing a waterfall, its drifting spray zone and recommended upwind camera positions
Spray drifts downwind; set up on the windward side of the pool.

Places that teach

  • Steinsdalsfossen near Norheimsund has a path that runs behind the curtain of water, a lesson in backlight and spray management.
  • Kjosfossen is a short stop on the Flåm Railway, ideal for practising fast handheld exposures.
  • The Seven Sisters on Geirangerfjord are best seen from the water, where a ferry deck gives full height.
  • Låtefossen near Odda twins beside the road, so you can study the fall's two streams with minimal walking.
  • Dynjandi in Iceland's Westfjords shows how a tiered fall rewards a slow walk upward with changing compositions.

Safety at moving water

Wet rock near falls is often coated in algae and is far more slippery than it looks. Never cross barriers or step onto rocks in the flow for a cleaner angle. Below regulated dams, water levels can rise quickly when releases begin; do not stand in dry riverbeds downstream of hydropower installations.

Waterfall session checklist

  1. Choose the feelingForce, texture or calm, before you touch the dials.
  2. Bracket shutter speedsShoot a range at each position and compare on site.
  3. Set up upwindProtect the lens and keep spray off the front element.
  4. Check flow and seasonSnowmelt and regulation change the fall from week to week.
  5. Respect wet rock and barriersNo frame is worth a fall into moving water.

Find Your Next Viewpoint